
Appearance
Your First Look at Zeus.ai
Quick Answer
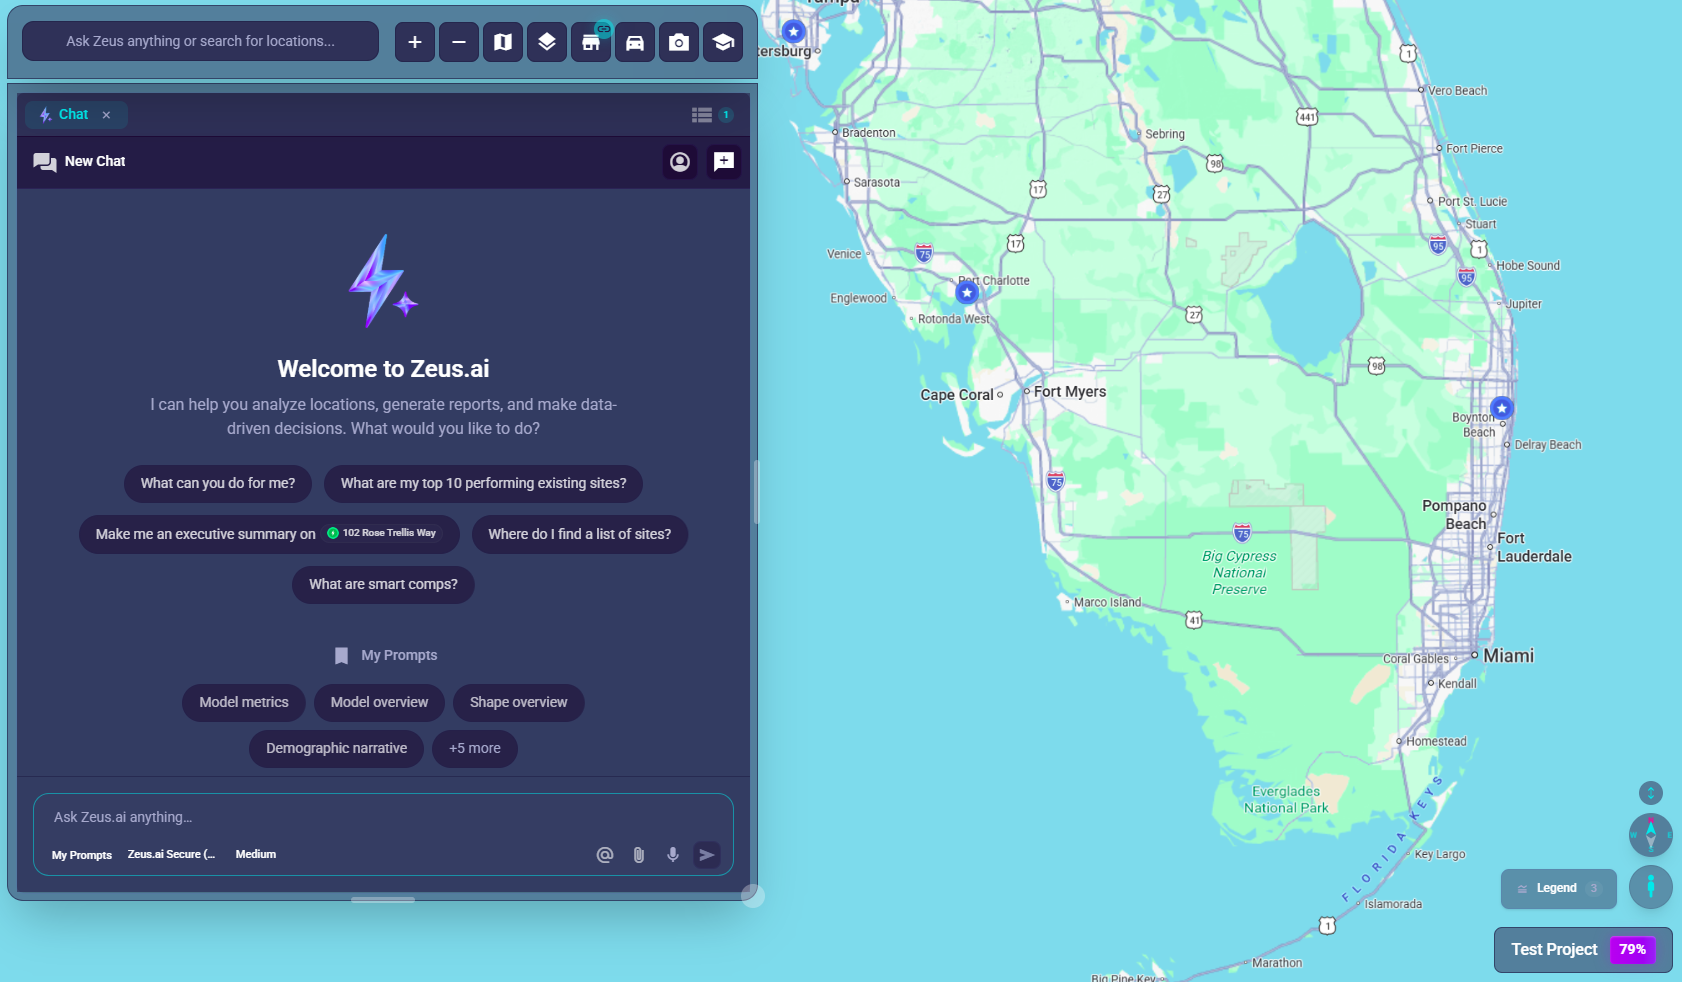
When you first open a Zeus.ai project, you'll see a vertical app sidebar on the far left (product switcher, Help & Support, your profile), a map covering most of the screen, a chat and control bar along the lower portion of the map, and one or more workspace panels for Sites, Layers, Base Map, Location Analytics, or Chat.
The Main Screen
Here is the most common desktop layout when a project first opens:
text
┌──────────┬──────────────────────────────────────────────────────┐
│ SiteZeus │                                                      │
│ ──────── │      ●  ●●                                           │
│ Project  │           ●     THE MAP                              │
│          │       15 ◉          (markers and clusters)           │
│ Products │              ●                                       │
│ • Locate │                  ●●                                  │
│ • Cust.  │                                          [Project]   │
│   Insig. │                                                      │
│ • Build  ├──────────────────────┬───────────────────────────────┤
│ • Sell   │ [_Ask Zeus..._][+][-][🗺️][📚][🏪][🚦][📷][🎓]        │
│          │      CHAT BAR / MAP CONTROLS  WORKSPACE PANELS       │
│ Help &   │                                                      │
│ Support  │                                                      │
│          │                                                      │
│ [HB] You │                                                      │
└──────────┴──────────────────────────────────────────────────────┘
Reading the diagram left to right:
- Left sidebar (the meta-frame) — your product switcher (Locate, Customer Insights, Build, Sell), Back to Projects, project name, Help & Support, and your profile / sign-out at the bottom. The sidebar is visible on every page inside a project; see Sidebar Navigation for the full tour.
- Map area — the working canvas for the Locate product. Markers, clusters, and pop-ups live here.
- Chat bar — your AI chat input plus quick controls (zoom, Base Map, Layers, Sites, Traffic, Create map report, Help) along the lower portion of the map.
- Workspace panels — tabbed detail views (Sites, Location Analytics, Layers, Base Map, Chat, Site Sonar, Listings, and more) that dock beside the map.
Important:
- Zeus.ai supports more than one desktop layout
- The sidebar can be collapsed to an icon rail; hover the rail to peek-preview the full sidebar
- Some projects open with only the chat bar visible
- Some projects open with
Sites,Layers,Base Map, orChatalready open - Mobile uses a different control layout than desktop — the sidebar opens as a slide-in drawer
The Map Area (Center of Screen)
What you see:
- A map covering most of your screen
- Markers (pins): Colored dots/pins showing locations
- Clusters: Circles with numbers (grouped locations)
- Your cursor: Changes to a hand when over the map
What the markers mean:
Existing Sites (Operating Locations)
| Status | Color | Description |
|---|---|---|
| Mature | Blue | Established, fully operational |
| New | Purple | Recently opened |
| Non-Traditional | Cyan | Non-standard format |
| Closed | Gray | Permanently or temporarily closed |
Proposed Sites (Planned Locations)
| Status | Color | Description |
|---|---|---|
| Consideration | Green | Under initial evaluation |
| Approved | Blue | Approved for development |
| Letter of Intent | Orange | LOI signed |
| In Development | Pink | Currently being built |
Other Markers
| Type | Color | Description |
|---|---|---|
| Search Pin | Pink/Red | Temporary search results |
| Selected | Electric Blue Glow | Currently selected location |
What you can do:
- Scroll to zoom in/out
- Click and drag to move around
- Click a marker to see its details
The Chat Bar (Bottom-Left)
This dark panel is your main control strip for navigation, map tools, help, and chat.
Reading it left to right:
text
[Ask Zeus anything or search for locations...] [+] [-] [🗺️] [📚] [🏪] [🚦] [📷] [🎓]
                   │                            │   │    │    │    │    │    │    └──── Help
                   │                            │   │    │    │    │    │    └───────── Create map report
                   │                            │   │    │    │    │    └────────────── Traffic
                   │                            │   │    │    │    └─────────────────── Sites
                   │                            │   │    │    └──────────────────────── Layers
                   │                            │   │    └───────────────────────────── Base Map
                   │                            │   └────────────────────────────────── Zoom controls
                   └──────────────────────────────────────────────────────────────────── Chat input
There is no "Back" arrow or profile control in the chat bar. A collapsed sidebar shows a hamburger toggle instead; profile access is in the left sidebar footer. On Street View, the left slot shows a "Back to Map" control instead of the zoom buttons.
What Each Button Does
| Button | Looks Like | What It Does |
|---|---|---|
| Chat input | Text field | Type your questions here |
| Zoom In | + (plus) | Makes map closer |
| Zoom Out | − (minus) | Makes map wider |
| Base Map | 🗺️ (map icon) | Opens map themes and appearance |
| Layers | 📚 (layers icon) | Opens Site Sonar and Shapes overlays |
| Sites | 🏪 (store icon) | Opens location list, filters, clustering |
| Traffic | 🚦 | Toggles the traffic layer / Traffic tab |
| Create map report | 📷 (camera icon) | Freezes the current map view into a shareable report |
| Help | 🎓 (school icon) | Opens the Zeus.ai help site |
The Workspace Panels
These panels may or may not already be open when you arrive.
To open it:
- Click any location marker on the map, OR
- Click the Sites button (🏪) in the chat bar, OR
- Click the Layers button (📚) or Base Map button (🗺️) in the chat bar
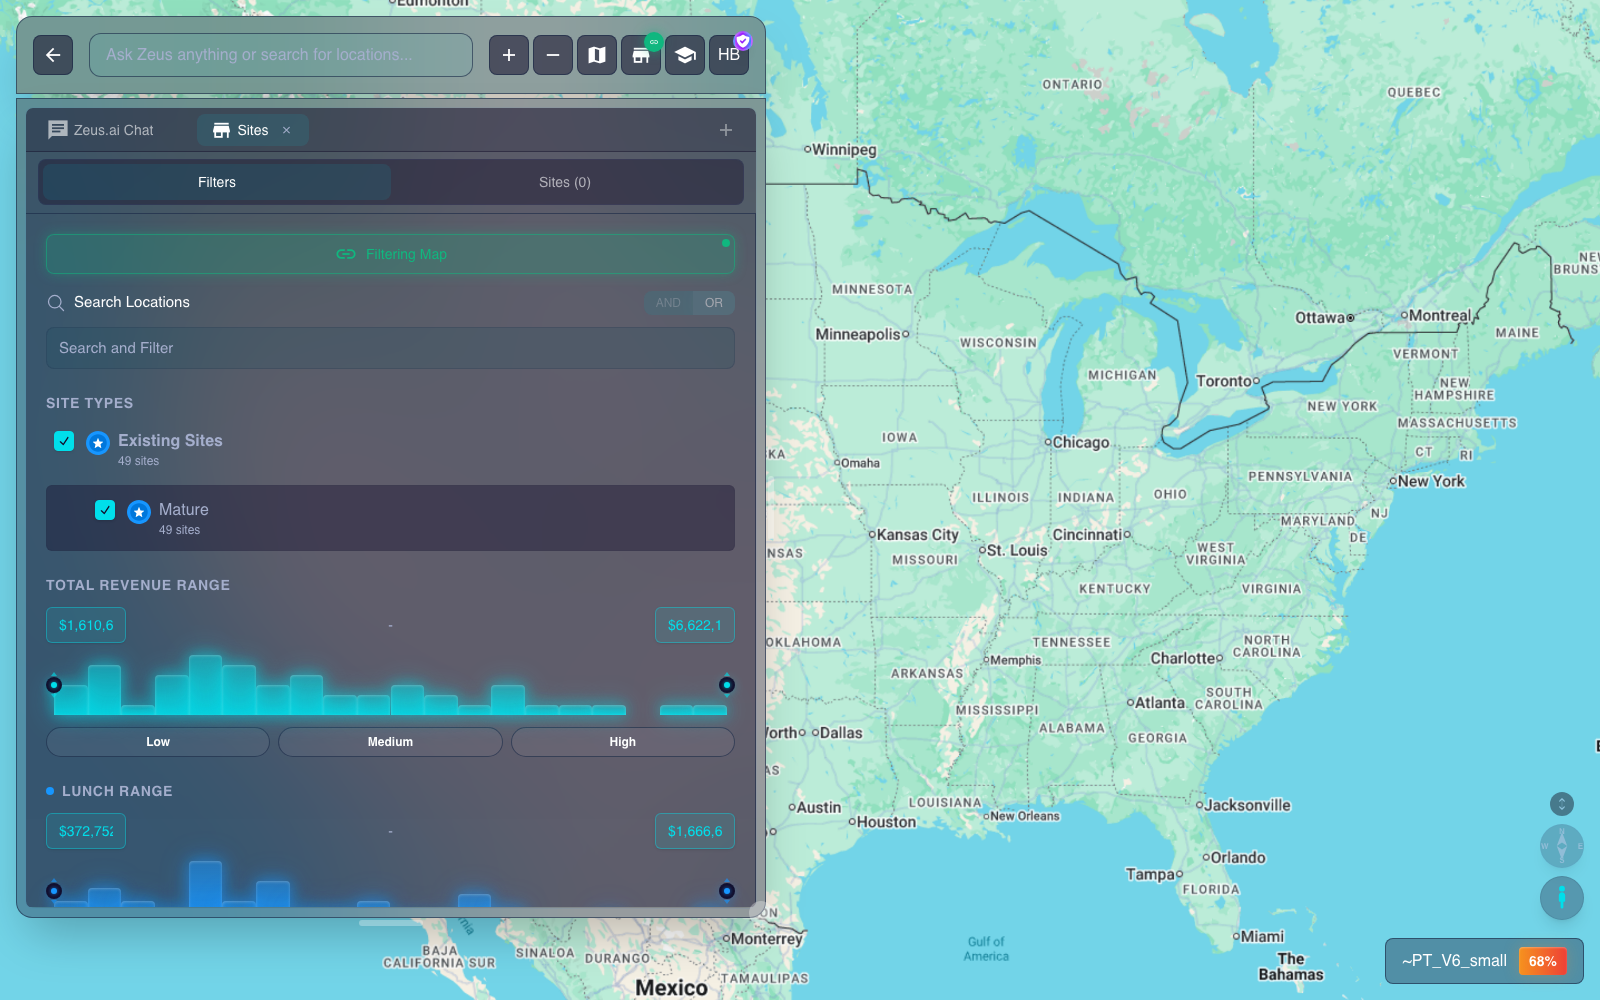
What you usually see on desktop:
text
┌───────────────────────────────────────────────────┐
│ [Sites] [Location Analytics] [Chat] [Layers] [Base Map] [+] │
├───────────────────────────────────────────────────┤
│                                                     │
│                                                     │
│     Tab content here                               │
│     (list, analytics, etc.)                        │
│                                                     │
│                                                     │
└───────────────────────────────────────────────────┘
The tabs:
| Tab | Icon | What It Contains |
|---|---|---|
| Sites | 🏪 | Location list, search, filters, clustering, "Filtering Map" toggle |
| Location Analytics | 📊 | Zeustimate, Demographics, Forecast Drivers, Smart Comparables |
| Chat | 💬 | Expanded AI conversation view |
| Layers | 📚 | Site Sonar and Shapes overlays, active/saved Sites views |
| Base Map | 🗺️ | Themes, data layers, and map features |
| + | + | Add more tabs |
Layout note:
- In the
moderndesktop layout, these panels usually appear to the left of the map - In the
navigatordesktop layout, panels can be arranged differently - On mobile, panels appear in a bottom-sheet style view instead of this desktop arrangement
The Project Badge (Bottom-Right)
In the bottom-right corner of the map, you'll see:
text
┌─────────────────────────┐
│  My Project Name  [85%] │
└─────────────────────────┘- Project name: Which project you're viewing
- Colored percentage: Power Score (optional metric)
Hover Hints
Everything has a tooltip!
When you hover your mouse over any button:
- Wait briefly (about 1 second)
- A tooltip appears explaining what it does
- Move away and the tooltip disappears
This is the fastest way to learn what buttons do.
Interactive Elements
Clickable Things
- Location markers - Click to open the
Location Analyticspanel for that site - Cluster circles - Click to zoom into that group
- All buttons - Click to activate
- Tab names - Click to switch tabs
- Menu items - Click to select
Draggable Things
- The map - Click and drag to pan
- Panel edges - Drag to resize
- Panel headers - Drag to undock/move
Scrollable Things
- The map - Scroll to zoom
- Panel content - Scroll to see more
- Lists - Scroll through items
Color Meanings
| Color | Where You See It | What It Means |
|---|---|---|
| Electric blue | Borders, glows | Selected/active element |
| White | Text, icons | Normal/default state |
| Green | Toggle buttons, badges | Enabled/connected/success |
| Red | Toggle buttons, errors | Disabled/disconnected/error |
| Various | Markers | Site status category (see marker colors above) |
First Things to Try
1. Zoom the Map
- Scroll up on your mouse to zoom in
- Scroll down to zoom out
- Watch the markers get bigger/smaller
- Clusters break apart as you zoom in
2. Click a Location
- Find a marker (colored pin) on the map
- Click it
- Watch the
Location Analyticspanel open with details - See the Zeustimate, Demographics, and more
3. Ask the AI Something
- Click the chat input (it says "Ask Zeus anything or search for locations...")
- Type: "What can you help me with?"
- Press Enter
- Read the response
4. Open the Sites List
- Find the store icon (🏪) in the chat bar
- Click it
- Browse the list of locations
- Try the filters to narrow down results
5. Explore Layers and Base Map
- Click the Sites button (🏪) in the chat bar - toggle Smart Clustering
- Click the Base Map button (🗺️) in the chat bar - change the theme and other map appearance options
- Click the Layers button (📚) in the chat bar - see Site Sonar and Shapes overlays
"Where Is...?" Quick Reference
| Looking for... | Look here... |
|---|---|
| Switch products | Left sidebar (Locate, Customer Insights, Build, Sell) |
| Back to Projects | Top of the left sidebar |
| Help & Support / Knowledge | Left sidebar — Help & Support section |
| Your account / sign out | Bottom of the left sidebar (your initials and name) |
| How to type a question | Chat input field (center of the chat bar) |
| How to zoom | + and − buttons (right side of the chat bar) |
| List of all locations | Sites button (store icon) in the chat bar → Sites tab |
| Location filters | Sites tab → Filter controls |
| Map themes | Base Map button (map icon) in the chat bar |
| Clustering settings | Sites button (store icon) → Smart Clustering card |
| Help articles (desktop quick) | Help button (school icon) in the chat bar |
| Location analytics | Click any marker on the map |
Next Steps
Now that you know where everything is:
- Learn to Navigate the Map - Zoom and pan like a pro
- Understand the Tabs - Know what each tab contains
- Try the AI Chat - Ask questions and get answers
- Filter Locations - Find exactly what you need
- Explore Map Themes - Customize your map view